Household Preparedness Starter Checklist
A prepared household starts with knowing what you have and what you still need. Use this checklist to review your supplies, emergency plans, home security, and defensive measures. Adapt it to your household’s size, health needs, pets, budget, and local conditions.
Start with the essentials and build steadily. Record what you have, what you need, and anything that needs checking or replacing. Include everyone in the planning so they know where supplies are kept and what to do if normal routines are disrupted.
Water Storage
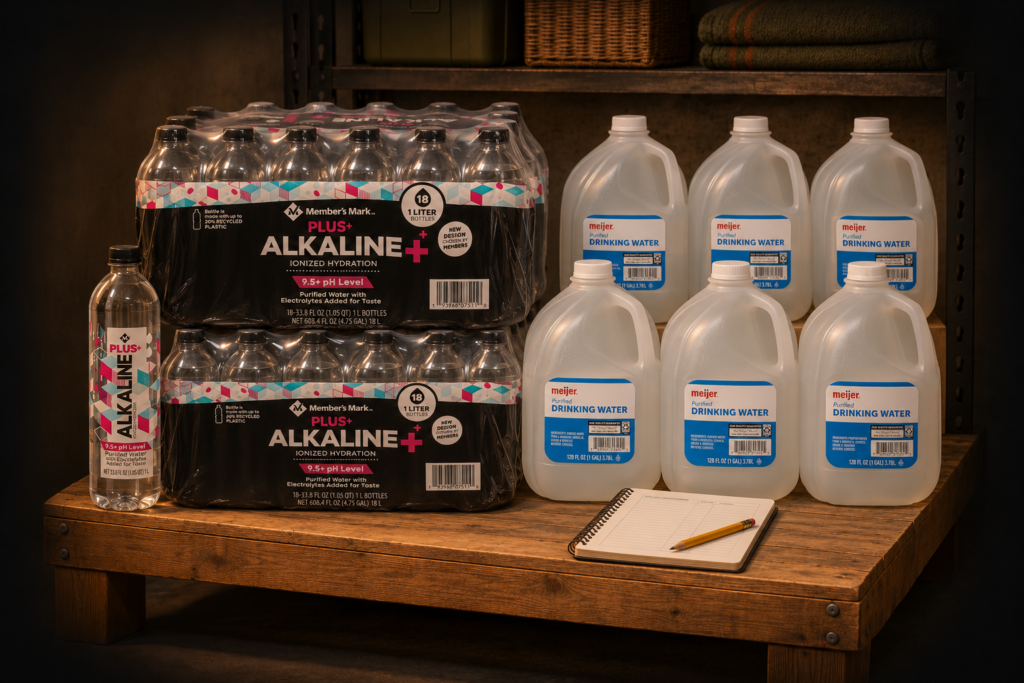
Store at least one gallon of water per person per day for drinking, cooking, and basic hygiene. Start with a three-day supply and work toward two weeks as space and budget allow. Store additional water for pets, hot weather, and individual health needs.
☐ Calculate your household’s water needs, including pets.
☐ Store unopened commercially bottled water or safe drinking water in cleaned and sanitized containers intended for potable water.
☐ Keep water in a cool location, away from direct sunlight, fuel, pesticides, and household chemicals.
☐ Label home-filled containers “Drinking Water” and include the date filled. Replace this water every six months.
☐ Follow expiration dates on commercially bottled water. Inspect all containers regularly for leaks, cracks, or damaged seals.
☐ Make sure everyone in the household knows where drinking water is stored.
Choosing Suitable Drinking-Water Containers
☐ Choose durable, food-grade plastic containers specifically manufactured for drinking-water storage, with tightly sealing lids. Do not assume a container is suitable simply because it is plastic or carries a recycling symbol.
☐ Food-grade stainless steel containers designed for drinking water are another option. Follow the manufacturer’s cleaning and sanitizing instructions.
☐ Avoid ordinary metal drums unless specifically manufactured and lined for potable water. Glass can hold drinking water but is vulnerable to breakage.
☐ Never reuse containers that held fuel, pesticides, cleaners, or other toxic chemicals—even after washing. Avoid secondhand barrels with an unknown history.
☐ Choose containers with a pouring spout or spigot so water can be dispensed without putting hands or utensils inside.
Your Household Water Target
Number of people: __________
Number of days: __________
People × days × 1 gallon = __________ gallons
Additional water for pets and other needs: __________ gallons
Total drinking-water storage target: __________ gallons
Currently stored: __________ gallons
Still needed: __________ gallons
Next inspection or replacement date: __________
Rainwater Collection for Nonpotable Uses
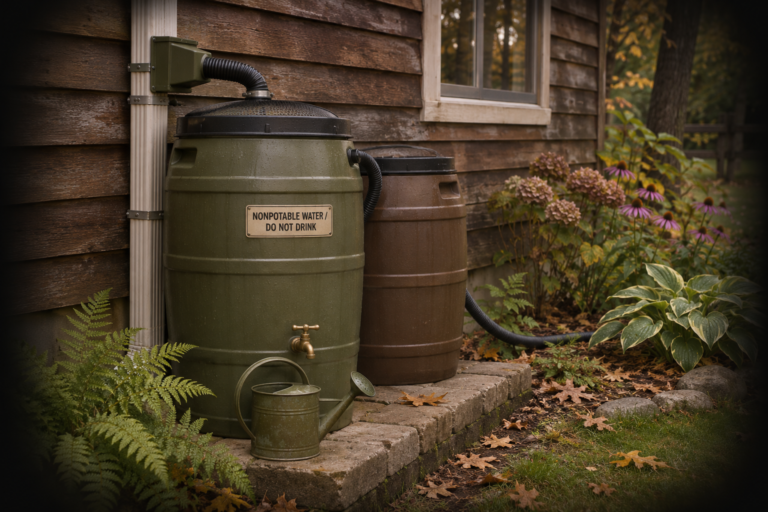
A rain barrel can provide water for ornamental plants and suitable outdoor cleaning tasks, helping preserve your drinking-water supply. Roof runoff can contain animal waste, germs, and chemicals—even when it looks clear.
Collected rainwater is called harvested rainwater. Gray water is previously used household water, such as water from showers or laundry. Neither should be assumed safe to drink.
☐ Use a purpose-built rain barrel with a secure cover and screened openings to keep out insects and debris.
☐ Clearly label the barrel and its outlet “Nonpotable Water—Do Not Drink.”
☐ Keep collected rainwater separate from drinking-water containers and plumbing.
☐ Clean gutters, screens, and barrels regularly. Consider a first-flush diverter to redirect the initial, dirtier roof runoff. Screens and diverters do not make the water safe to drink.
☐ Use untreated roof runoff for ornamental plants and cleaning items that are not used for preparing or serving food.
☐ Use a safe water source for edible plants and washing produce. Consult your local extension office or health department before using collected rainwater on food crops.
☐ Do not count untreated rain-barrel water toward your household’s drinking-water target.
Rainwater Storage Record
Total barrel capacity: __________ gallons
Intended uses: ________________________________________
Last inspection and cleaning: __________
Maintenance or repairs needed: ________________________________________
Reference guidance:
CDC — How to Create an Emergency Water Supply
Utah State University Extension — Storing Water
CDC — Collecting Rainwater and Your Health
Food Storage and Meal Planning
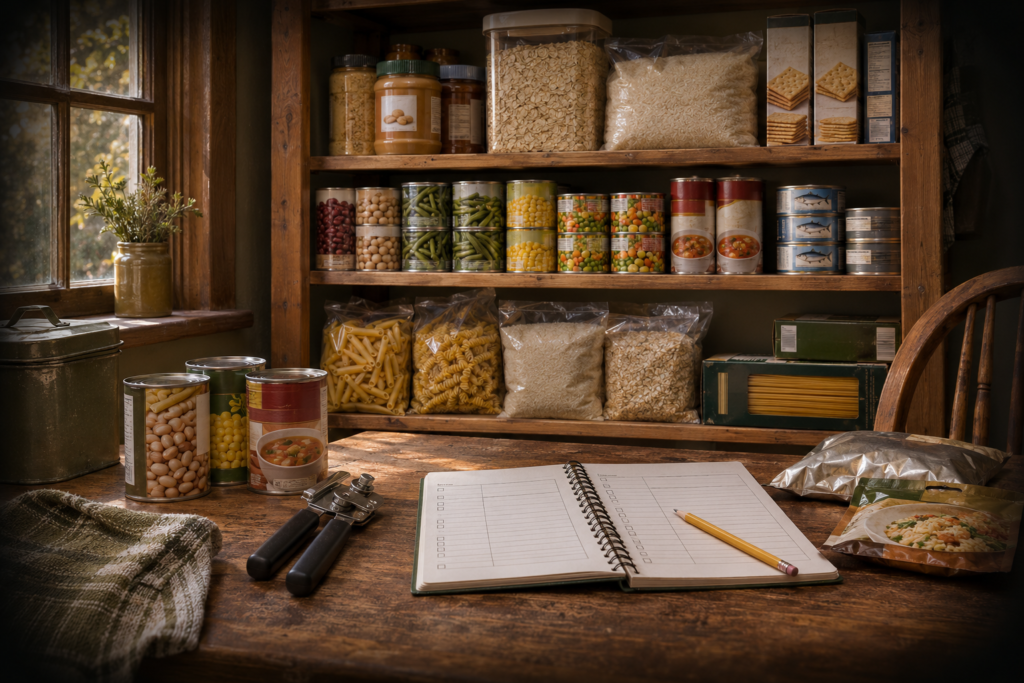
Build your food supply around familiar foods your household already eats. Start with a three-day supply of shelf-stable meals and snacks, then expand as your budget and storage space allow. Include options that require no cooking or refrigeration, and account for allergies, dietary needs, infants, and pets.
Plan complete meals rather than simply counting cans. Consider the drinking water, fuel, equipment, and cleanup each meal requires. Use older supplies first and replace what you use so your emergency food remains part of a practical, regularly rotated pantry.
Dehydrated and Freeze-Dried Foods

Both methods preserve food by removing moisture, but they use different processes and produce different results.
Dehydrated foods use heat and airflow to evaporate moisture. Foods often shrink and become chewy or leathery. For many home-dehydrated foods, recommended storage times range from four months to one year, depending on the food and storage conditions. Commercially dehydrated products may last considerably longer when specially processed and packaged. Follow the product’s storage instructions.
Freeze-dried foods are frozen and placed under vacuum, allowing ice to turn directly into water vapor. This leaves a lightweight, porous food that generally retains more of its original shape and rehydrates readily. Some commercially prepared freeze-dried foods can last up to 25 years when unopened, properly packaged, and stored under the specified conditions.
A long shelf life depends on the food, its fat content, processing, packaging, and storage temperature. Simply sealing food in a container does not guarantee decades of storage. Once opened, the original unopened shelf-life claim no longer applies.
Including These Foods in Your Plan
☐ Combine everyday pantry foods with longer-lasting dehydrated or freeze-dried options as your budget allows.
☐ Check whether products are dehydrated, freeze-dried, or a mixture. Read the shelf-life and storage instructions for each product.
☐ Store long-term supplies in their intact, sealed packaging in a cool, dry location away from sunlight.
☐ Try a few meals before buying larger quantities. Check taste, portion sizes, calories, allergens, and dietary suitability.
☐ Include enough safe drinking water for rehydration, plus any fuel and equipment required by the preparation instructions.
☐ Keep ready-to-eat foods available for situations when cooking or rehydration is impractical.
☐ Date opened packages and follow the manufacturer’s instructions for use after opening.
The home-drying storage range comes from the National Center for Home Food Preservation; the freeze-drying explanation and potential 25-year commercial shelf life are supported by University of Minnesota Extension.
Everyday Food Supplies
☐ Set aside at least three days of shelf-stable food for everyone in your household.
☐ Choose familiar foods that meet your household’s dietary needs, including allergies and food intolerances.
☐ Include foods that can be eaten without cooking, such as canned beans, canned fish, nut butter, crackers, and canned fruit.
☐ Plan breakfasts, lunches, dinners, and snacks. Check serving sizes and calories rather than relying on the number of packages.
☐ Include appropriate food for infants and other household members with specific needs, plus food for pets.
☐ Keep a manual can opener and the utensils needed to prepare and serve meals.
☐ Account for the safe drinking water and cooking fuel each planned meal requires.
☐ Store food in a cool, dry location, protected from pests and household chemicals.
☐ Check packaging and dates regularly. Use older supplies first and replace what you use.
☐ Keep a written inventory so you can identify shortages without unpacking everything.
Your Household Food Target
Number of people: __________
Number of days planned: __________
Dietary needs and allergies: ________________________________________
Meals and snacks already available: ________________________________________
Food still needed: ________________________________________
Additional water or cooking supplies needed: ________________________________________
Pet food needed: ________________________________________
Next inventory review: __________
Food Safety and Meal Preparation During a Power Outage
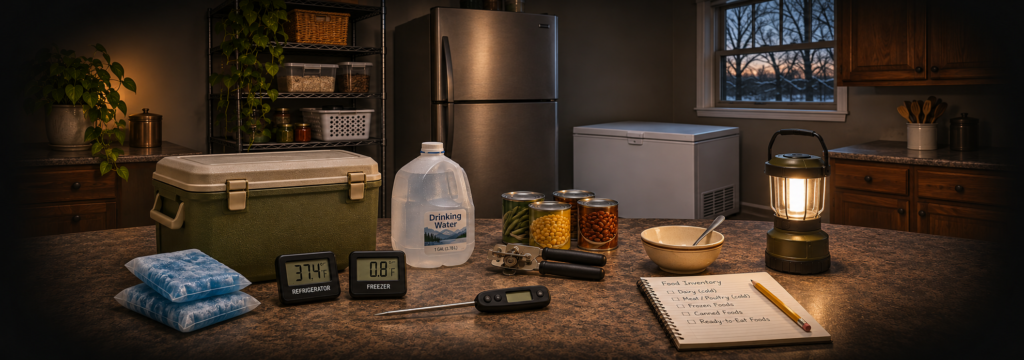
A power outage can interrupt cooking and allow refrigerated or frozen food to warm to unsafe temperatures. Keep appliance doors closed, record when the outage began, and have shelf-stable meals available so you can leave cold supplies undisturbed.
Protecting Refrigerated and Frozen Food
☐ Keep appliance thermometers in your refrigerator and freezer. During normal operation, maintain the refrigerator at 40°F or below and the freezer at 0°F or below.
☐ Record the time the power goes out. Keep refrigerator and freezer doors closed as much as possible.
☐ Plan around approximately four hours of cold storage in an unopened refrigerator, 48 hours in a full freezer, or 24 hours in a half-full freezer. These are estimates, not guarantees.
☐ Keep a cooler and frozen gel packs available. If the outage approaches four hours, transfer refrigerated perishables to a cooler with enough ice or gel packs to maintain 40°F or below.
☐ Check actual food temperatures when deciding what to keep. Discard refrigerated perishables after four hours without power unless you can verify they remained at 40°F or below.
☐ Discard perishable foods such as meat, poultry, fish, milk, eggs, and leftovers that have been above 40°F for two hours or more. Shorten that limit to one hour when exposed to temperatures above 90°F.
☐ Frozen food that still contains ice crystals or measures 40°F or below can generally be refrozen or cooked. Check the food-specific guidance linked below; some products, including ice cream, have different recommendations.
☐ Never taste food to determine whether it is safe. Food can be unsafe even when it looks and smells normal. When in doubt, throw it out.
Preparing Meals During an Outage
☐ Use ready-to-eat pantry foods when safe cooking equipment is unavailable.
☐ Use outdoor-only camping stoves and grills outdoors, away from doors, windows, and vents. Never operate them inside the home or garage.
☐ Use safe drinking water for preparing meals and cleaning food-contact surfaces.
☐ Keep raw meat separate from ready-to-eat food, and use a food thermometer to check cooking temperatures.
☐ Prepare only what your household can eat promptly when reliable refrigeration is unavailable.
☐ Do not attempt to rescue improperly stored food by cooking it. Cooking does not reliably eliminate every hazard caused by unsafe storage.
Your Power-Outage Food Plan
Power outage began—date and time: ____________________
Refrigerator temperature: __________ °F
Freezer temperature: __________ °F
Cooler temperature: __________ °F
Ice or frozen gel packs available: ____________________
Ready-to-eat meals available: ____________________
Safe outdoor cooking method, if available: ____________________
Food discarded and needing replacement: ____________________
Reference Guidance
CDC — Keep Food Safe After a Disaster or Emergency
FoodSafety.gov — Food Safety During a Power Outage: What to Keep and What to Discard
Lighting and Backup Power
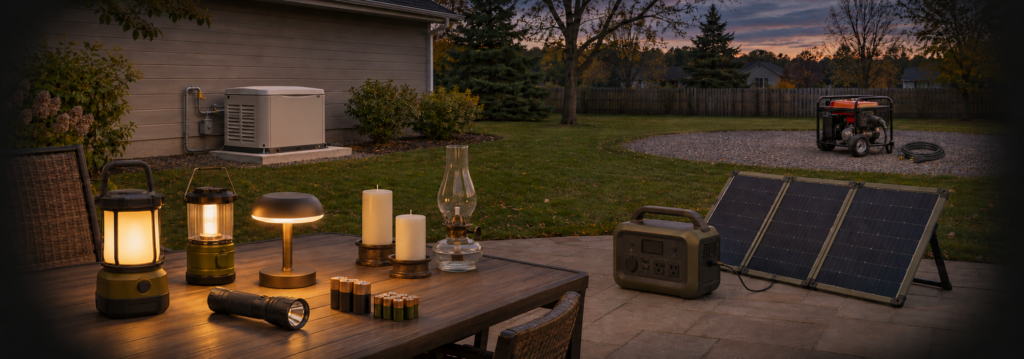
Reliable lighting and backup power help you move safely, stay informed, keep essential devices running, and protect refrigerated supplies. Start with affordable basics—a flashlight, battery lantern, spare batteries, and a charged phone power bank—then expand as your needs and budget allow.
Emergency Lighting
☐ Keep flashlights or headlamps where they can be found easily in the dark, including near beds and frequently used exits.
☐ Have battery-operated lanterns available to light shared spaces. Headlamps leave your hands free for tasks.
☐ Stock the correct spare batteries and check rechargeable lights regularly.
☐ Test your lights periodically and make sure everyone knows where they are stored.
☐ Use battery-operated lighting as your first choice. Candles and oil lamps introduce fire hazards.
☐ If candles are used, place them in stable, noncombustible holders, away from anything that can burn and out of reach of children and pets. Extinguish them before leaving the room or sleeping.
☐ Use oil lamps only where the manufacturer permits, with the specified fuel and ventilation. Never leave them unattended or refill them while lit or hot.
Choosing Backup Power
☐ List the devices that matter most during an outage: phones, radios, essential medical equipment, refrigeration, and necessary lighting.
☐ Keep power banks charged and store the charging cables your devices require.
☐ If using a portable battery power station, check its battery capacity, continuous output, and ability to handle appliance startup loads. Test your intended equipment before an emergency.
☐ Plan how you will recharge batteries during an extended outage. Solar charging depends on sunlight, panel capacity, weather, and equipment compatibility.
☐ Understand that a “solar generator” is typically a battery power station charged by solar panels. It produces no combustion exhaust during normal operation and may be used indoors when the manufacturer permits. Keep it dry, ventilated, and within its operating limits.
☐ Do not assume rooftop solar will power your home during a blackout. Confirm whether your system includes equipment designed to provide backup power when the grid is down.
☐ Arrange an alternative location or assistance plan if essential medical equipment cannot remain powered.
Fuel-Powered Generator Safety
Gasoline, diesel, propane, and natural-gas generators produce carbon monoxide—a poisonous gas you cannot see or smell. Opening windows or garage doors does not make indoor operation safe.
☐ Operate portable fuel-powered generators outdoors, at least 20 feet from the home and more than 20 feet from doors, windows, and vents. Direct exhaust away from buildings, including neighboring homes.
☐ Never run a portable fuel-powered generator inside a home, garage, basement, shed, crawlspace, or enclosed porch.
☐ Have permanently installed standby generators professionally located, connected, and maintained according to the manufacturer’s requirements and applicable codes.
☐ Install and maintain battery-operated or battery-backup carbon monoxide alarms and smoke alarms. Test them regularly and replace them according to their instructions.
☐ If a carbon monoxide alarm sounds, get everyone—including pets—outside immediately. Call 911 from outside and do not reenter until emergency responders say it is safe.
☐ Never plug a generator into a household wall outlet. Have a qualified electrician install approved transfer equipment for any connection to household wiring.
☐ Use correctly rated outdoor cords and inspect them for damage. Keep connections dry and cords clear of walking routes.
☐ Keep the generator dry using protection designed for safe operation. Never move it into an enclosed space to shelter it from rain.
☐ Turn the generator off and let it cool before refueling. Store fuel in approved containers outside living areas and away from ignition sources.
☐ Follow the generator’s load limits, maintenance schedule, and operating instructions.
Your Lighting and Backup-Power Plan
Flashlights and headlamps available: ____________________
Battery lanterns available: ____________________
Spare battery types and quantities: ____________________
Power banks or battery stations available: ____________________
Essential devices to power: ____________________
Estimated runtime with those devices: ____________________
Recharging method: ____________________
Safe portable-generator location, if applicable: ____________________
Last smoke and carbon monoxide alarm test: ____________________
Equipment or supplies still needed: ____________________
Next equipment check: ____________________
Reference Guidance
CDC — Carbon Monoxide Poisoning Basics
Communications and Emergency Information
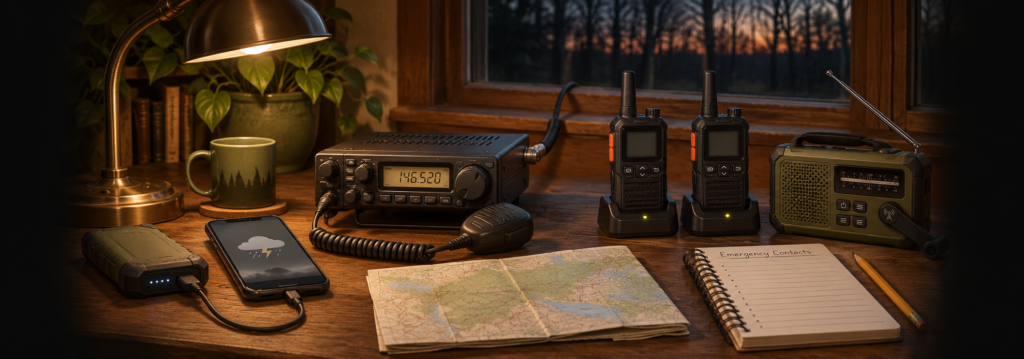
Reliable information and a clear communication plan help your household respond when normal routines break down. Prepare more than one way to receive emergency alerts, contact family members, and find accurate local updates.
Do not rely entirely on your phone or home internet. Keep essential contact information on paper, have a battery-powered emergency radio available, and agree on meeting places and an out-of-area contact in case household members become separated. Make sure everyone understands the plan and knows how to use the equipment.
Your Household Communication Plan
☐ Write down important phone numbers, including household members, emergency contacts, schools, workplaces, utility providers, and medical offices.
☐ Give each household member a printed contact card. Keep another copy with your emergency supplies.
☐ Choose an out-of-area contact who can receive updates and help relay information between separated family members.
☐ Agree on two meeting places: one close to home and another outside your neighborhood.
☐ Decide how and when to check in if you become separated. Include a backup plan for when phones or internet service are unavailable.
☐ Review school, childcare, and workplace emergency procedures, including who is authorized to pick up children.
☐ Account for hearing, vision, language, or other communication needs within your household.
☐ Practice the plan and update it whenever phone numbers, addresses, or household circumstances change.
Your Communication Record
Out-of-area contact: ____________________
Contact’s phone number: ____________________
Meeting place near home: ____________________
Meeting place outside the neighborhood: ____________________
Agreed check-in arrangements: ____________________
Printed contact cards stored: ____________________
Next plan review: ____________________
Communication Equipment and Emergency Alerts
Keep more than one way to receive information and contact others. Choose equipment your household can use confidently, and understand which devices depend on cellular coverage, internet access, or other infrastructure.
☐ Keep cellular phones charged, with suitable charging cables and charged power banks readily available.
☐ Enable emergency alerts on compatible phones and sign up for notifications from your local emergency management agency and utility providers.
☐ Keep a battery-powered AM/FM radio for local news and emergency broadcasts. Store spare batteries alongside it.
☐ Include a NOAA Weather Radio with an alert function and battery backup. Set it up for your area and check reception where you intend to use it.
☐ Save important contact information and local maps for offline use. Keep printed copies available in case devices fail or batteries run out.
☐ If you use handheld two-way radios, practice with them between the locations where you expect to need communication. Buildings, terrain, antenna placement, and other conditions can greatly affect usable range.
☐ Understand the limitations of cellular push-to-talk radios, including Rapid Radios™ LTE models. These depend on working network infrastructure; they are not a replacement for direct radio-to-radio communication when cellular service is unavailable.
☐ If amateur radio is part of your plan, obtain the appropriate training and license, learn your equipment, and practice before an emergency. Include backup power and understand whether your planned communication depends on a repeater.
☐ Keep operating instructions, charging equipment, spare batteries, and relevant channel information together.
☐ Verify emergency information through official sources before acting on it or sharing it. Check the location and time of an alert to avoid relying on outdated information.
Know What Your Equipment Can Do
A weather radio receives broadcasts; it does not let you call for help. Cellular phones and LTE push-to-talk radios depend on available networks. Direct two-way radios can communicate without cellular service, but their range is limited by equipment and conditions. Amateur radio offers additional options, but requires knowledge, practice, and suitable equipment.
Build your plan around tested capabilities rather than advertised maximum range.
Your Communication Equipment Record
Phones and charging equipment: ______________________________
Emergency broadcast radio: ______________________________
Handheld radios and agreed channels: ______________________________
Network or repeater dependencies: ______________________________
Backup batteries or power supplies: ______________________________
Equipment or training still needed: ______________________________
Next equipment check and practice date: ______________________________
NOAA Weather Radio Receivers — receiver features, alerts, and battery backup. weather.gov
How Rapid Radios LTE Communication Works — explains cellular coverage requirements and network limitations. Rapid Radios
ARRL: Ham Radio Licenses — information about getting started with amateur radio licensing.
Sanitation and Personal Hygiene
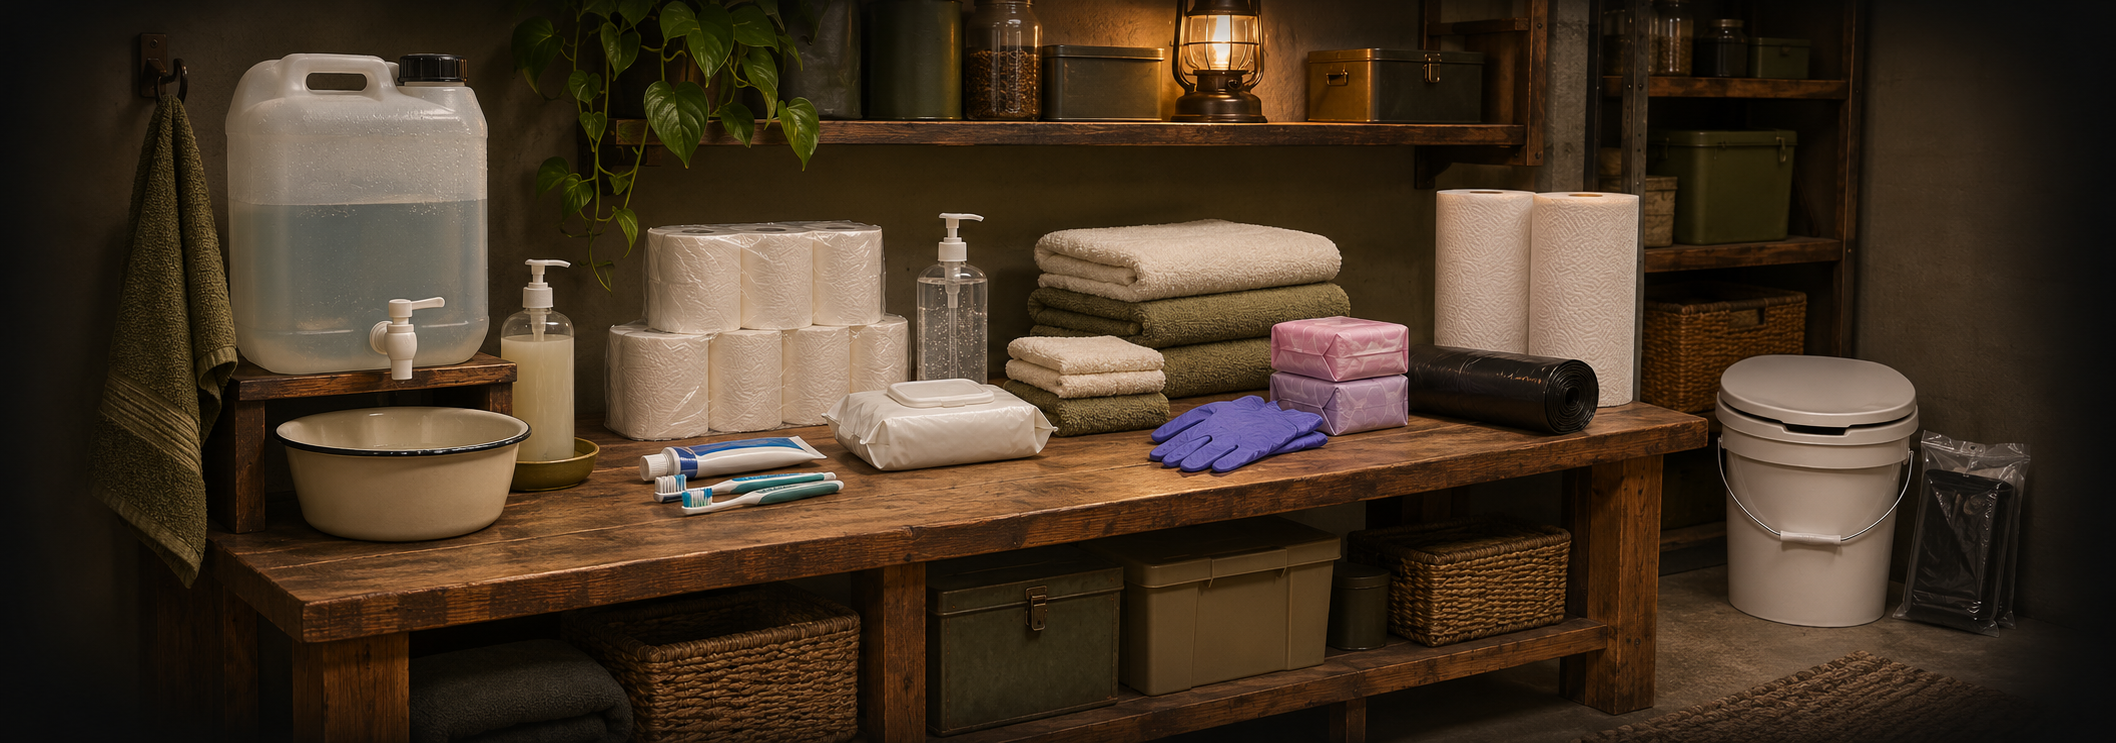
Keeping clean and managing waste become more difficult when running water, sewer service, or trash collection is disrupted. Prepare supplies for handwashing, personal hygiene, cleaning, and temporary toilet arrangements before you need them.
Plan for everyone in your household, including infants, older adults, and anyone with additional care needs. Keep hygiene supplies organized and accessible, and make sure everyone knows where they are stored.
Paste this beneath the introduction:
Personal Hygiene Supplies
☐ Store soap, toilet paper, toothbrushes, toothpaste, washcloths, and clean towels sufficient for everyone in your household.
☐ Include menstrual products, diapers, wipes, incontinence supplies, and other personal care items your household uses.
☐ Keep hand sanitizer containing at least 60% alcohol available for times when soap and water are unavailable. Sanitizer is less effective on visibly dirty or greasy hands and does not remove all germs or harmful chemicals.
☐ Keep personal cleansing wipes separate from surface disinfecting wipes. Never use surface disinfectants on skin.
☐ Store spare trash bags, ties, disposable gloves, and a covered waste container.
☐ Keep supplies dry, organized, and accessible. Check expiration dates where applicable and replace items as they are used.
Handwashing During a Water Outage
☐ Prepare a temporary handwashing station using a clean water container with a spigot, soap, and a basin to catch wastewater.
☐ Use clean running water rather than a shared bowl of standing water. Follow local health department or utility instructions about whether tap water is safe to use during an advisory.
☐ Wash hands with soap and water for at least 20 seconds, especially after using the toilet or changing diapers and before handling food.
☐ Clean hands before and after caring for someone who is sick or treating a wound.
☐ Provide clean towels or paper towels for drying hands.
☐ Include handwashing water in your household supply planning. Do not assume untreated rain-barrel water is suitable.
Your Hygiene Supply Record
Number of people: __________
Days of supplies planned: __________
Personal care requirements: ______________________________
Handwashing equipment and water location: ______________________________
Supplies still needed: ______________________________
Next supply check: __________
CDC: Personal Hygiene During an Emergency supports the handwashing and temporary washing-station guidance. CDC
CDC: Hand Hygiene Frequently Asked Questions explains sanitizer limitations and the difference between personal wipes and surface disinfectants.
Temporary Toilet Arrangements and Waste Disposal
A water outage and a sewer failure require different responses. If the sewer system is working, stored water may allow you to flush a toilet. If sewer service is disrupted, backing up, or authorities advise against flushing, stop using it and switch to your emergency toilet arrangements.
☐ Identify an alternative toilet option before an outage. Consider a portable camping toilet or a sturdy bucket toilet with a properly fitted seat, lid, and compatible waste bags.
☐ Store sufficient liners, toilet paper, and absorbent material recommended for your chosen toilet system. Follow the manufacturer’s instructions.
☐ Choose a private, accessible location away from food preparation and drinking-water storage. Make sure the toilet is stable and suitable for everyone who needs to use it.
☐ Keep soap, handwashing water, and disposable gloves nearby. Wash hands after using the toilet or handling waste, including after removing gloves.
☐ Close waste bags securely before they become overfilled. Place them in a dedicated, covered, leak-resistant container away from children, pets, wildlife, and food supplies.
☐ Follow local public health and waste collection instructions for disposal. Do not assume bagged human waste can go into regular household trash.
☐ Never dump toilet waste into storm drains, waterways, or your yard.
☐ Keep wipes, diapers, menstrual products, gloves, and paper towels out of toilets—even when packaging describes them as “flushable.”
☐ Clean the toilet seat and other contact surfaces regularly using products suitable for the equipment. Follow label instructions and never mix cleaning chemicals.
☐ Keep emergency toilet equipment separate from containers used for drinking water, food, or washing dishes.
Your Emergency Sanitation Plan
Emergency toilet type and location: ______________________________
Liners and other supplies stored: ______________________________
Handwashing station location: ______________________________
Temporary waste storage location: ______________________________
Local disposal instructions or contact: ______________________________
Supplies still needed: ______________________________
Next equipment and supply check: __________
Washington State Department of Health: Toilet Use During an Emergency — temporary toilets and secure waste storage. Washington State Department of Health
Wayne County: Sanitation in an Emergency — distinguishes water outages from sewer failures. Wayne County, Michigan
Oakland County: Sewer Preservation — explains why wipes should stay out of toilets.
First Aid and Medical Needs
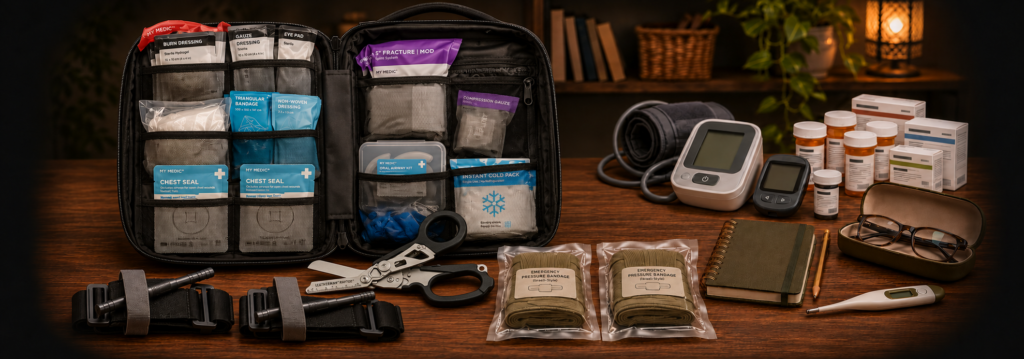
A prepared household needs a medical kit that covers more than minor cuts and everyday discomfort. Plan for serious bleeding, injuries, ongoing medical conditions, and interruptions to your normal supply of medications and medical equipment.
Build your kit around your household’s needs, including comprehensive first aid supplies, tourniquets, emergency pressure dressings such as Israeli bandages, and a reserve of prescribed medications arranged with your healthcare provider or pharmacist.
Equipment and training belong together. Include first aid, CPR, and bleeding-control training in your preparedness plan, and make sure household members know where supplies are stored. The goal is to provide immediate help and maintain essential care while professional assistance is being arranged.
First Aid and Bleeding-Control Supplies
☐ Keep a comprehensive first aid kit in a clearly identified, accessible location. Make sure household members know where it is and how it is organized.
☐ Stock adhesive bandages in assorted sizes, sterile gauze pads, nonstick dressings, rolled gauze, medical tape, elastic wraps, and triangular bandages.
☐ Include commercial windlass tourniquets from reputable manufacturers and authorized suppliers. Keep dedicated training tourniquets separate from those reserved for emergencies.
☐ Include emergency pressure dressings, such as Israeli bandages, alongside compressed wound-packing gauze. Add hemostatic gauze appropriate to your bleeding-control training.
☐ Keep trauma shears, a permanent marker, and several pairs of correctly sized nitrile gloves with your bleeding-control supplies.
☐ Include a CPR face shield or pocket mask, a digital thermometer, tweezers, instant cold packs, and emergency blankets.
☐ Consider a moldable splint and additional support bandages if you have training in their use.
☐ Include supplies suited to the ages, allergies, and individual needs of your household. Choose latex-free products where needed.
☐ Keep sterile dressings sealed until needed. Replace supplies with damaged packaging, expired products, and anything used during treatment.
☐ Store the kit away from moisture, excessive heat, and direct sunlight. Keep urgent supplies easy to reach while securing medications and sharp instruments from children.
☐ Complete hands-on first aid, CPR/AED, and bleeding-control training. Practice locating and opening supplies so unfamiliar packaging does not become an obstacle during an emergency.
Plan Beyond the Kit
Choose quantities based on your household’s size and circumstances. One dressing or one pair of gloves may not be enough for a serious incident. A large advertised “piece count” does not necessarily mean a kit contains adequate trauma supplies.
Severe bleeding and other life-threatening emergencies require immediate professional assistance. Call 911 as soon as possible and use your equipment according to your training and dispatcher instructions.
Your First Aid Equipment Record
Main kit location: ______________________________
Bleeding-control supplies location: ______________________________
Additional supplies needed: ______________________________
Household members with first aid or CPR training: ______________________________
Bleeding-control training completed or planned: ______________________________
Next kit inspection: __________
Next training refresher: __________
American Red Cross: Make a First Aid Kit — general first aid supplies and kit maintenance.
American College of Surgeons: Enhanced STOP THE BLEED Kit — examples of dedicated bleeding-control equipment, including a tourniquet, gauze, and protective gloves.
Medications and Ongoing Medical Needs
Emergencies can interrupt pharmacy access, medical appointments, deliveries, and electricity needed for essential equipment. Plan ahead for the treatments and supplies your household relies on every day.
☐ Work with your healthcare provider and pharmacist to arrange an emergency reserve of prescribed medications. Aim for at least a week’s supply where feasible, with quantities suited to your treatment and refill arrangements.
☐ Keep a current medication list showing each medicine’s name, strength, dose, schedule, and purpose. Include allergies and important medical conditions.
☐ Store reserve medications in their original labeled packaging. Keep prescription details, pharmacy contact information, and healthcare provider numbers with your emergency records.
☐ Rotate your reserve through normal prescribed use before it expires, replacing it as permitted. Do not skip doses or reduce prescribed amounts to build a stockpile.
☐ Include suitable nonprescription medicines your household normally uses. Ask a pharmacist about age restrictions, interactions, and duplicate ingredients.
☐ Keep prescribed rescue medications readily accessible to those who need them. Make sure designated caregivers understand the person’s treatment plan and know when to call 911.
☐ Follow each medication’s storage instructions. Protect supplies from moisture, excessive heat, freezing, and unauthorized access.
☐ Prepare a cooling plan for medicines that require refrigeration, including an appropriate cooler, cooling packs, and thermometer. Maintain the medication’s specified temperature range and protect it from direct contact with frozen packs.
☐ If storage temperatures fall outside the recommended range, contact a pharmacist, healthcare provider, or manufacturer for product-specific advice. Do not assume every medication has the same safe time outside refrigeration.
☐ Stock the consumables needed for ongoing care, such as glucose test strips, lancets, prescribed injection supplies, dressings, hearing-aid batteries, or equipment filters. Include a suitable sharps container if needed.
☐ Plan backup power for prescribed equipment such as CPAP machines, oxygen concentrators, or other electrically powered devices. Confirm compatibility and expected runtime with the equipment supplier.
☐ Arrange a backup location, transportation, and assistance if essential treatment cannot safely continue at home. Include plans for appointments such as dialysis or scheduled infusions.
☐ Keep spare eyeglasses and essential mobility or communication aids available where practical.
☐ Protect printed medical records in a water-resistant pouch that can leave with you during an evacuation. Keep sensitive information secure but accessible to designated caregivers.
Your Household Medical Continuity Record
Essential medications and reserve quantities: ______________________________
Pharmacy and telephone number: ______________________________
Healthcare provider and telephone number: ______________________________
Medication refrigeration requirements: ______________________________
Essential medical equipment: ______________________________
Backup power and expected runtime: ______________________________
Additional medical supplies needed: ______________________________
Backup care location and transportation: ______________________________
Next medication and equipment review: __________
CDC: Preparing Your Prescriptions for an Emergency — medication reserves, records, and supplies. CDC
CDC: Building an Emergency Kit — a week’s prescription supply and equipment for individual needs. CDC
FDA: Safe Drug Use After a Natural Disaster — medication storage, refrigeration, and temperature concerns. FDA
FDA: Emergency Situations and Medical Devices — preparing for equipment and supply disruptions. FDA
Home Security and Defensive Preparedness

Home security and defensive preparedness combine physical protection, awareness, communication, and a practiced household plan. Review doors, windows, locks, exterior lighting, and alarms, and decide how everyone will respond if they feel threatened or discover an attempted intrusion.
If firearms or other defensive tools are part of your plan, include secure storage, responsible access, and appropriate training. Make sure household members understand how to reach safety, contact emergency services, and account for one another. Build your preparations around protecting people, avoiding unnecessary confrontation, and making sound decisions under pressure.
Securing Your Home
☐ Inspect exterior doors, frames, hinges, deadbolts, and strike plates. Repair damage and consider suitable reinforcement where needed.
☐ Check window locks, basement windows, sliding doors, and entrances from attached garages. Make security checks part of your daily routine.
☐ Keep emergency exits usable from inside. Security measures must not trap household members or obstruct escape during a fire.
☐ Provide exterior lighting around entrances, walkways, and driveways. Check coverage after dark and replace failed bulbs or batteries.
☐ Trim vegetation that blocks your view of entrances or provides concealment immediately beside doors and windows.
☐ Secure ladders, tools, and other equipment that could be used to gain entry. Keep sheds and garages locked.
☐ Make sure your house number is clearly visible from the street so emergency responders can locate you.
☐ Test alarms, door and window sensors, and security cameras. Understand which functions stop working when electricity, internet, or cellular service fails.
☐ Check backup batteries and local recording options where available. Do not assume a camera system continues recording simply because the cameras still have power.
☐ Protect connected security devices with unique passwords, current software, and multifactor authentication where supported.
☐ Control access to keys, garage remotes, and entry codes. Review access when household arrangements change or a device is lost.
☐ Verify unexpected visitors before opening the door. Contact the organization through a number you obtain independently if someone claims to represent a utility or service provider.
☐ Keep a charged phone and working flashlight accessible, including near sleeping areas.
☐ Agree on a household response to suspicious activity, attempted entry, or an alarm. Include how to contact 911, assist anyone needing help, and account for everyone.
Your Home Security Review
Doors, windows, or locks needing attention: ______________________________
Lighting improvements needed: ______________________________
Alarm and camera backup arrangements: ______________________________
Keys, remotes, or access codes to review: ______________________________
Priority repairs or purchases: ______________________________
Next security check: __________
Defensive Equipment and Household Response
Defensive equipment belongs within a practiced household plan. Decide how to protect household members, communicate during an emergency, and obtain help. Choose equipment you can safely operate, securely store, and maintain.
☐ If firearms are part of your plan, use secure storage that prevents access by children, visitors, and unauthorized people. Keep keys and combinations controlled.
☐ Check storage equipment regularly, including locks, mounting hardware, batteries, and manufacturer-provided backup access methods.
☐ Obtain qualified instruction in firearm safety, safe handling, secure storage, and the responsibilities associated with defensive use. Include decision-making and conflict avoidance in your training.
☐ Review applicable laws concerning firearm possession, storage, transportation, and use of force. Seek qualified legal guidance when requirements are unclear.
☐ Maintain firearms and other defensive equipment according to manufacturer instructions. Arrange professional inspection when equipment is damaged or unreliable.
☐ If you keep pepper spray or another defensive tool, understand its limitations, storage requirements, expiration date, and applicable restrictions. Obtain appropriate instruction before relying on it.
☐ Keep a separate handheld flashlight available for identifying people and investigating ordinary household problems. Do not use a firearm-mounted light as a general-purpose flashlight.
☐ Agree on a simple household warning phrase and what everyone should do when they hear it. Include arrangements for children, guests, and anyone needing assistance.
☐ Identify escape routes and a room where household members can close and lock the door while contacting emergency services if leaving is unsafe.
☐ Make clear who will call 911 and who will assist household members needing help. Be prepared to provide your address, the nature of the emergency, and information about injuries.
☐ Avoid going outside to confront suspicious people or pursuing someone who leaves. If you suspect an intruder is inside, avoid searching the home yourself; move to safety and contact police.
☐ Practice household communication and movement without handling firearms or other weapons. Keep these rehearsals calm, clearly announced, and appropriate for everyone’s age and abilities.
☐ Discuss how to respond when police arrive: keep hands empty and visible, avoid sudden movements, and follow officers’ instructions.
☐ Keep first aid and bleeding-control supplies accessible, and include medical assistance in your emergency plan.
Your Household Response Plan
Household warning phrase: ______________________________
Primary escape route: ______________________________
Alternative escape route: ______________________________
Room to use if leaving is unsafe: ______________________________
Person responsible for calling 911: ______________________________
Assistance needed by household members: ______________________________
Equipment maintenance or storage improvements needed: ______________________________
Training to arrange: ______________________________
Next household practice date: __________
Keep the completed plan private. Do not record safe combinations, access codes, or detailed firearm inventories on a worksheet that may be shared.
Household Members, Pets, and Individual Needs
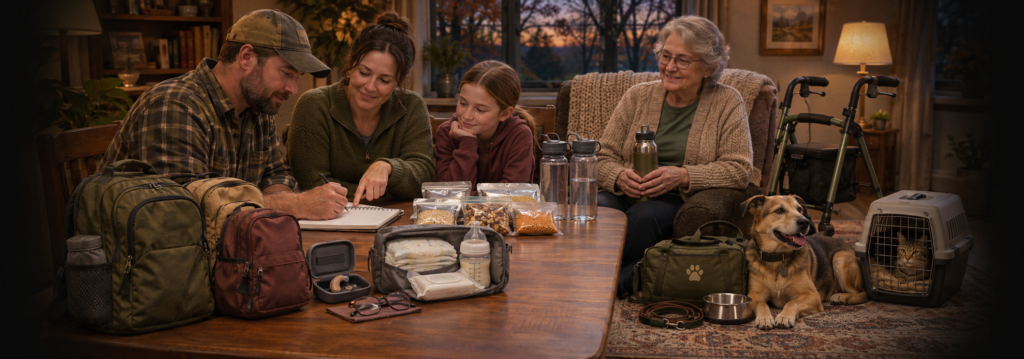
Every household has different needs. Build your preparations around the people and animals who depend on you, including children, older adults, people with disabilities, and anyone with dietary, communication, or care requirements.
Involve household members in planning and ask what assistance works best for them. Include familiar foods, essential personal supplies, comfort items, and arrangements for pets and service animals. Make sure your plan remains workable if a usual caregiver is unavailable or you need to leave home.
Planning for Individual Needs
☐ Review each household member’s daily needs, including food, personal care, mobility, communication, supervision, and assistance.
☐ Include people in decisions about their own support. Ask what help they need rather than making assumptions based on age or disability.
☐ Store familiar foods that meet dietary requirements and allergies. Label supplies clearly and include suitable preparation equipment.
☐ Include infant and toddler supplies where needed: diapers, wipes, feeding supplies, spare clothing, and familiar comfort items.
☐ Give children simple, age-appropriate roles in the household plan. Practice calmly and make sure they know which trusted adults can help them.
☐ Keep spare eyeglasses, hearing-aid batteries or chargers, and essential communication aids accessible.
☐ Plan how someone using a cane, walker, wheelchair, or other mobility aid will move through the home and leave it if necessary. Keep routes clear.
☐ Include accessible transportation and a suitable destination in your evacuation arrangements. Confirm that essential equipment can travel with its user.
☐ Identify a backup caregiver or trusted contact if the person who normally provides assistance is unavailable.
☐ Write down essential care instructions with the person’s agreement. Keep them accessible to designated helpers while protecting personal information.
☐ Include quiet activities, familiar objects, and other supplies that help household members manage stress or changes in routine.
☐ Review the medication and equipment plans from the previous section alongside these arrangements so essential needs are not overlooked.
Your Individual Needs Record
Household member and assistance requested: ______________________________
Dietary requirements or allergies: ______________________________
Essential personal supplies: ______________________________
Mobility or communication equipment: ______________________________
Primary support person and contact: ______________________________
Backup support person and contact: ______________________________
Transportation arrangements: ______________________________
Supplies or arrangements still needed: ______________________________
Next household review: __________
Pets and Service Animals
Include your animals in both your stay-at-home and evacuation plans. Prepare their supplies in advance and arrange somewhere suitable to take them if you must leave.
☐ Store your animals’ usual food and additional drinking water. Include bowls, a manual can opener if needed, and feeding instructions.
☐ Keep food protected from moisture and pests. Rotate supplies and check expiration dates.
☐ Arrange a reserve of prescribed animal medications with your veterinarian. Include dosing instructions and any storage requirements.
☐ Prepare a secure, appropriately sized carrier or crate for each animal that needs one. Include suitable leashes, harnesses, and familiar bedding.
☐ Help animals become comfortable with carriers and transportation before an emergency.
☐ Keep identification tags and microchip contact details current. Store recent photographs of each animal with your emergency records.
☐ Keep copies of vaccination records, veterinary contact information, and relevant medical information in a water-resistant pouch.
☐ Include waste bags, litter and a portable litter tray where appropriate, cleaning supplies, and spare bedding.
☐ Identify accommodation that can accept your animals. Confirm arrangements directly rather than assuming every shelter or hotel accepts pets.
☐ Arrange a trusted backup caregiver who can collect or care for your animals if you cannot reach home. Make sure they have access instructions and your contact details.
☐ Include service animals’ food, equipment, medications, and care needs in their handler’s plan. Plan to keep the handler and animal together.
☐ Account for species-specific needs, including temperature control, transport, and power-dependent equipment for animals such as reptiles, fish, or birds.
☐ Keep animal supplies together in clearly marked bags or containers that can be loaded quickly.
Your Animal Preparedness Record
Animal names and species: ______________________________
Food and water supplies stored: ______________________________
Medications and special care requirements: ______________________________
Carrier, leash, and supply locations: ______________________________
Veterinarian and telephone number: ______________________________
Backup caregiver and telephone number: ______________________________
Evacuation destination: ______________________________
Supplies or arrangements still needed: ______________________________
Next supply and identification check: __________
Final Review and Next Steps
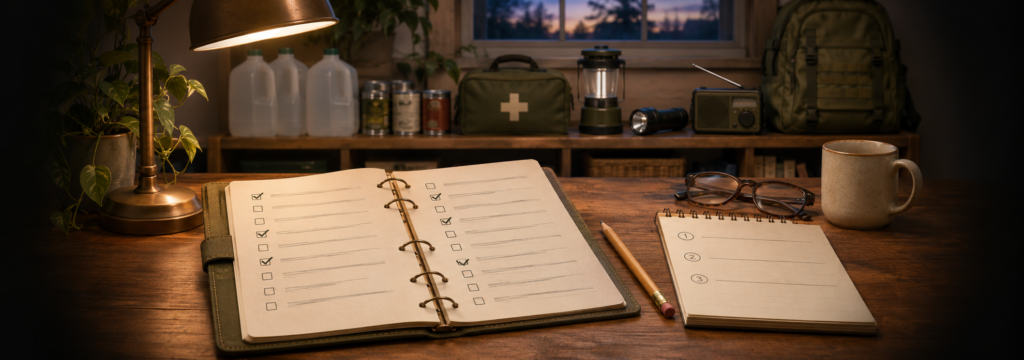
Preparedness improves through practical steps, regular checks, and household participation. Use this checklist to identify your most important gaps, then address them as time and budget allow.
☐ Review each section and identify your three highest-priority needs.
☐ Assign someone to each task and set a realistic completion date.
☐ Make sure household members know where essential supplies are stored.
☐ Check expiration dates, batteries, equipment condition, and emergency contact information.
☐ Review your arrangements for staying home, leaving home, and helping anyone who needs assistance.
☐ Practice your communication and evacuation plans together.
☐ Recheck supplies after use and review the plan whenever household circumstances change.
Your Next Three Actions
Priority 1: ______________________________
Person responsible: ______________________________
Target date: __________
Priority 2: ______________________________
Person responsible: ______________________________
Target date: __________
Priority 3: ______________________________
Person responsible: ______________________________
Target date: __________
Next Household Review Date: __________
Start with what you have. Address the most urgent needs first, build steadily, and keep your preparations usable.